During his working life, a citizen can change jobs several times. Facts about admission to the company, transfer to another position, dismissals, awards are entered into the work book . If there are a lot of records, blank sheets run out. Therefore, there is a need to sew in an insert .
The HR employee should pay close attention to this point. Otherwise, errors will be made during the sewing process. If due to negligence the document is damaged, the pension fund will not accept it when processing paperwork for pension payment.
When is the insert issued?
The work book is the main document confirming the length of service of a citizen. It is filled out by the employer at the main place of employment. If an employee works part-time for another employer, a second work book is not created. This information can be entered by the main employer at the request of the citizen.
After filling out all the pages, you need to sew in an insert. This requirement is established by paragraph 38 of the Government of the Russian Federation Decree No. 225 dated April 16, 2003. It is maintained in the same order as the main document (Government Decree of the Russian Federation dated October 10, 2003 No. 69).
What does the liner look like?
The form of the document is approved by Decree of the Government of the Russian Federation No. 225.
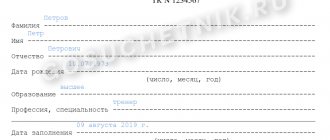
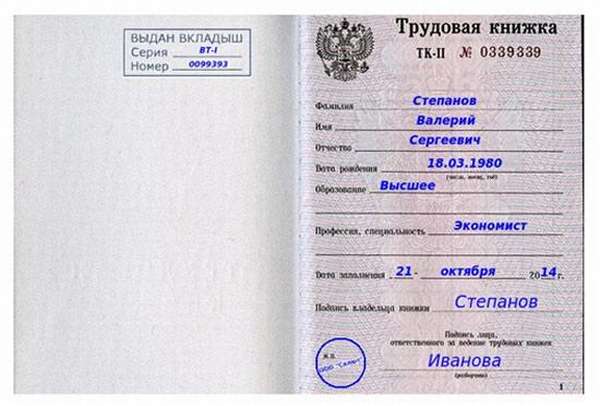
Liner sample
The document form is printed by Gosznak . It contains the series, number. Security measures allow you to identify paper and detect counterfeits.
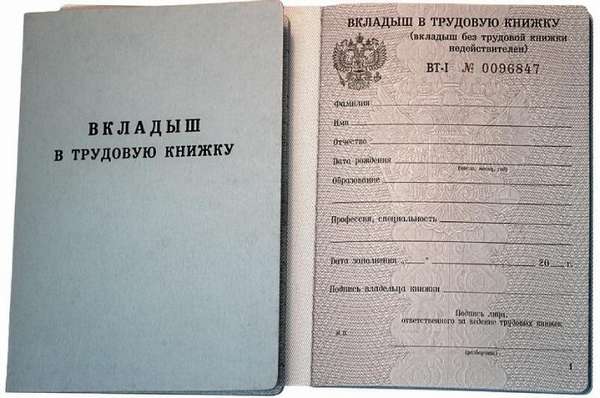
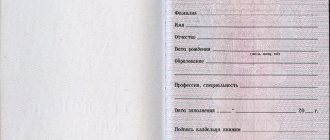
Insert in the work book
An insert without a work book is considered invalid.
Important! You cannot download forms from the Internet and print them out. The production of documents is carried out by the GOSZNAK association. The employer purchases forms from the manufacturer or distributor on the basis of an agreement.
Filling rules
Before sewing in the form, it must be filled out.
The first sheet should contain the following information:
- Full name of the citizen,
- Date of Birth,
- information about education,
- profession, specialty,
- record keeping start date,
- employee signature,
- signature of the personnel employee.
The employer's stamp is placed in the lower left corner. The pages must be numbered, continuing the numbering of the work book. Information about activities is entered in the same way as in the main document.
Main mistakes when designing an insert
Despite the fact that it is not difficult to issue an insert in the work book, some personnel workers, when faced with this issue for the first time, make mistakes. Forbidden:
- Use a regular blank sheet of paper instead of the liner;
- Add sheets from another work book;
- Glue in, rather than sew in, an additional sheet;
- Cross out the title of the section relating to awards and continue in it with entries about work activities.

A defect may also occur during the filling process. Some personnel workers first file it at the end of the book and write down the details on the title page, and only then begin filling it out. If there is an error in the records, the insert cannot simply be thrown away - it will have to be carefully removed from the document and an act of write-off drawn up, since information about it is already indicated on the title page.
Thus, preparing an insert in a work book is a process established by law that allows you to continue recording the employee’s work activities if they do not fit on the main sheets of the document. The HR department employee should initially carefully make the necessary entries in the document, number it, and only then sew it tightly at the end of the work book and indicate its details on the title page of the document.
How to sew in a liner correctly: step-by-step instructions
The legislator has not established clear requirements for the process of sewing in the liner. Let's look at the step-by-step instructions for document preparation used in practice.
Filling out the form (step 1)
The work book is stamped “Insert issued” . Usually the mark is made on the inside of the title page.
Sample entry “Insert issued”
The responsible employee enters the series and document number. Next, fill out the first page.
Recommendation! If the stamp is not made, it is allowed to enter information about the document with a ballpoint pen with blue or black ink. The employee writes “the insert has been issued”, puts the date and signature. Handwriting must be legible.
Preparing tools and documents (step 2)
Then the personnel worker prepares an awl, scissors, a needle, and black or white thread. The form is unfolded in the middle, the work book is on the last spread.
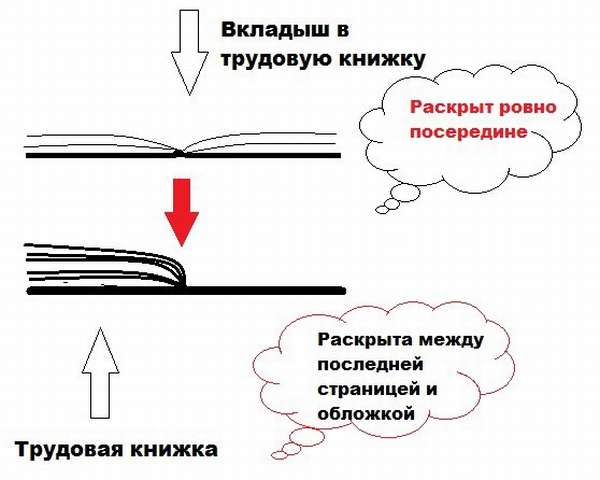
The process of preparing for sewing the liner
The HR department employee places one document on top of another and makes punctures with an awl along the folds.
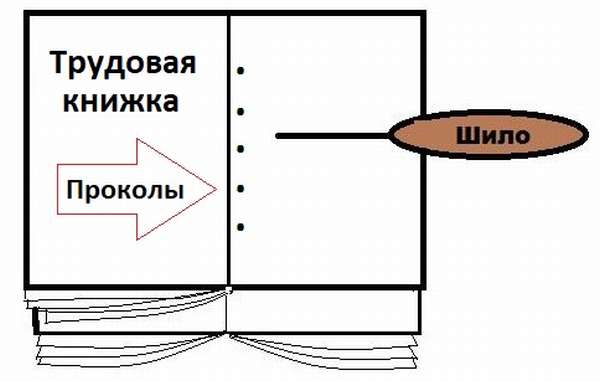
Punctures in the work book and insert
Usually 4-5 holes are made.
Sewing the liner (step 3)
Finally, you need to carefully sew in the form. The thread is passed through the holes several times.
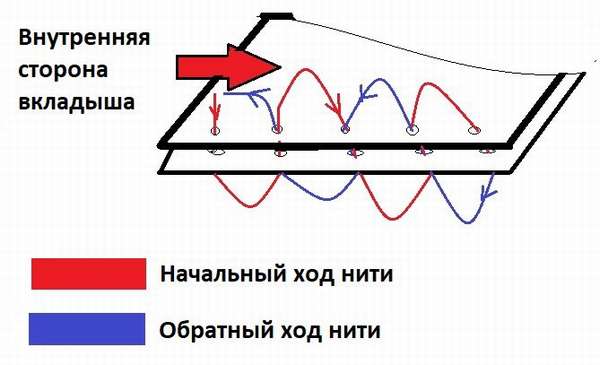
Sewing an insert into a work book
The threads are brought out in the middle, tied tightly into several knots, and the ends are cut off.
Not all HR employees know how to properly embed a document. Therefore, questions arise: where to sew the document, with what threads, can it be stapled or glued? Watch the video instructions for sewing in the liner.
Need to know! The law does not limit the maximum number of inserts. There may be several forms. They are sewn in one after another after filling the previous one. Each time it is marked with the details.
Making an entry in the accounting journals (step 4)
After completing the work, the HR specialist makes an entry in the receipt and expenditure book and the movement log. Magazines are numbered, stitched, threads glued, wax sealed or sealed. The head of the company certifies the seal with his signature.
Sewing the liner
After all sections have been filled out in the work book, the employer is obliged to independently take care of the preparation of the insert, which is a continuation of the main document. The Labor Code approved the form of the insert. The use of other forms is prohibited, since because of them the employee’s work book may be invalidated, and the employer will be required to pay a fine for improper maintenance and storage of such documents.
Attaching the insert to the work book consists of several stages.
- First, the personnel officer is required to make a note on the title page of the main document “Insert issued.” The series and number of the insert being sewn in is indicated next to it. This inscription can be made manually or instead a 10x25 mm stamp with the appropriate mark is affixed. The information provided must match the number and series of the insert that will be sewn into the document. Otherwise, it will be invalid, and all further work records will not be taken into account in the total length of service of its owner.
- Next, you should fill out the cover page of the insert with personal information about the employee. Entering this information should be based on the documents provided by the employee (passport and diploma/certificate of education). The date of filling out the insert must coincide with the day it was issued.
- Finally, you should carefully sew the insert into the work book. This must be done in a timely manner, since the responsibility for the fact that the insert is not sewn into the work book lies with the employer, and he will be fined for his negligence.
There are no basic rules for attaching the liner, but in practice it should be sewn on like this:
- the work book unfolds between the last page and the cover}
- the insert unfolds in the middle}
- With an awl or a thick needle, two holes are pierced in the middle of the insert and between the cover and the last sheet in the work book}
- Using a needle and thick white or black thread, the insert is sewn to the main document (the thread is passed through the holes several times so that its ends are inside the insert and not outside the work book)}
- the thread holding the work book and its insert together is tied with several strong knots.
Errors when sewing in the liner
Sewing the insert is quite simple, but this must be done after its series and number have been correctly entered on the title page of the work book.
Sometimes personnel officers are in a hurry and immediately sew on the insert, and then begin to fill it out. This often leads to the fact that the information in the insert differs from the information on the title page of the main document. In this regard, you have to unfasten the insert and make corrections in the work book, which in itself is a troublesome task.
If, nevertheless, the personnel department employee was in a hurry and made a mistake, he must carefully remove the insert from the work book using scissors. Next, a new, pre-filled insert is sewn into the work book (without piercing additional holes) indicating its series and number on the title page of the main document. The damaged insert is destroyed, and an act similar to a paper on the destruction of damaged work books is drawn up based on this fact.
Another common mistake made by inexperienced personnel officers who do not know how to sew an insert into a work book is tearing off its cover. You can't do this. This is explained by the fact that the insert form is approved by law, and any modification of it (removing the cover, pasting or tearing out sheets) is illegal and may serve as a reason for refusing to issue a pension benefit to its owner. The insert must be sewn to the work book in the form in which it was purchased.
The employer may require payment from the employee for the first insert. If the form was damaged by the personnel officer, payment for the next insert will not be charged to the employee.
Errors
It is not allowed to staple the document or glue it to the cover of the work book. It is not advisable to first sew on the form and then fill it out. This may lead to errors when entering data into the title page. You cannot leave the insert inside the work book without sewing it in. The document may get lost.
In practice, the following mistakes are often made:
- continue to enter information about work in the “Information about awards” section,
- glue blank sheets of paper, keep notes on them,
- they sew in old book forms instead of inserts,
- sew the document in the middle of the work book.
Also, you cannot sew in a form if the document is not completely filled out. The organization should always have spare forms so that they can be used if necessary.
How does the filling order change?
According to the old instructions, entries in the book could only be made with a pen, but from September 1, 2021, it will be possible to use technical means or apply stamps and seals.
If an employee quits due to transfer to another permanent job, you will need to indicate the name of the legal entity or the last name, first name and patronymic of the individual entrepreneur who will become the new employer.
They prescribed the procedure for actions in the case when an employee was temporarily transferred to another job, and then recognized such a transfer as permanent. In the “Work Information” section of the work book, you need to make the following entries:
- column 1 - serial number of the entry;
- Column 2 - date of actual commencement of the employee’s duties in connection with the temporary transfer;
- Column 3 - name of the structural unit of the organization, name of position, specialty, profession indicating qualifications;
- Column 4 - date and number of the order (instruction) or other decision on the basis of which the employee was transferred temporarily and transferred on a permanent basis.
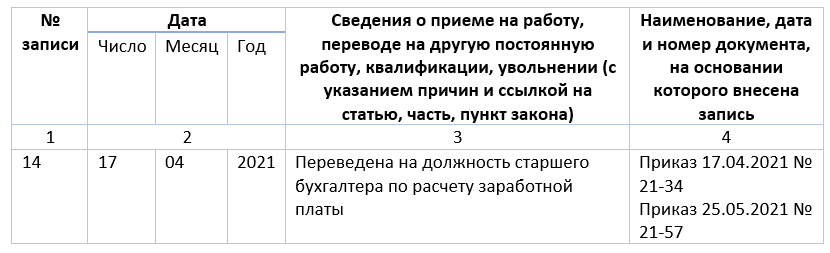
Sample entry in a paper work book when transferring to another position
Information about part-time work can be entered both in chronological order and in blocks (immediately about admission and dismissal) after dismissal from each organization.
Do I have to pay for the insert?
Forms are purchased at the expense of the employer. The organization has the right to deduct expenses for them from the employee. If due to the fault of the employer the documents are damaged, he will bear the costs of obtaining new ones.
Payment is collected from the employee in the following ways:
- via cash register,
- by transfer to a current account,
- deducted from wages.
This point is stipulated by the company’s local regulations. When deducting expenses from an employee's salary, written consent will be required.
Thus, you should familiarize yourself with the procedure for sewing the liner into the work book. This will help avoid serious mistakes. If the papers are damaged due to improper sewing of the document, you will have to issue a duplicate.